How to Use Groups and Classes in Inkle Books
Managing expenses across multiple teams or departments can quickly get messy. Without proper tracking, it’s hard to tell where money is going, how each department performs, or whether budgets are on track.
Inkle now lets you use Groups and Classes to organize your books.
You can use them to group your expenses or income by department, project, or activity, or whatever makes the most sense for your business.
It’s built to work the way you do: simple to set up, easy to use, and designed to give you a clear picture of how each part of your business is spending and earning.
What do you get out of it?
- You can categorize expenses by department, project, or team — whichever way makes sense for your business.
- You’ll be able to see spending patterns clearly without sorting through endless spreadsheets.
You can generate reports that show how each department or project is performing. - It helps you stay on top of budgets and make better decisions about where to spend next.
Step-by-Step: Assigning Groups and Classes
Before you begin - a quick note:
Inkle’s AI automatically categorizes your transactions under the right expense or income accounts. Once those categories are set, you can take it a step further by assigning Groups and Classes - to track spend by department, project, or activity.
1. Assigning a Group or Class
- Go to the Transactions page.
- Click on the transaction you want to edit.

- Scroll to the Classifications section.
- Click + Add.
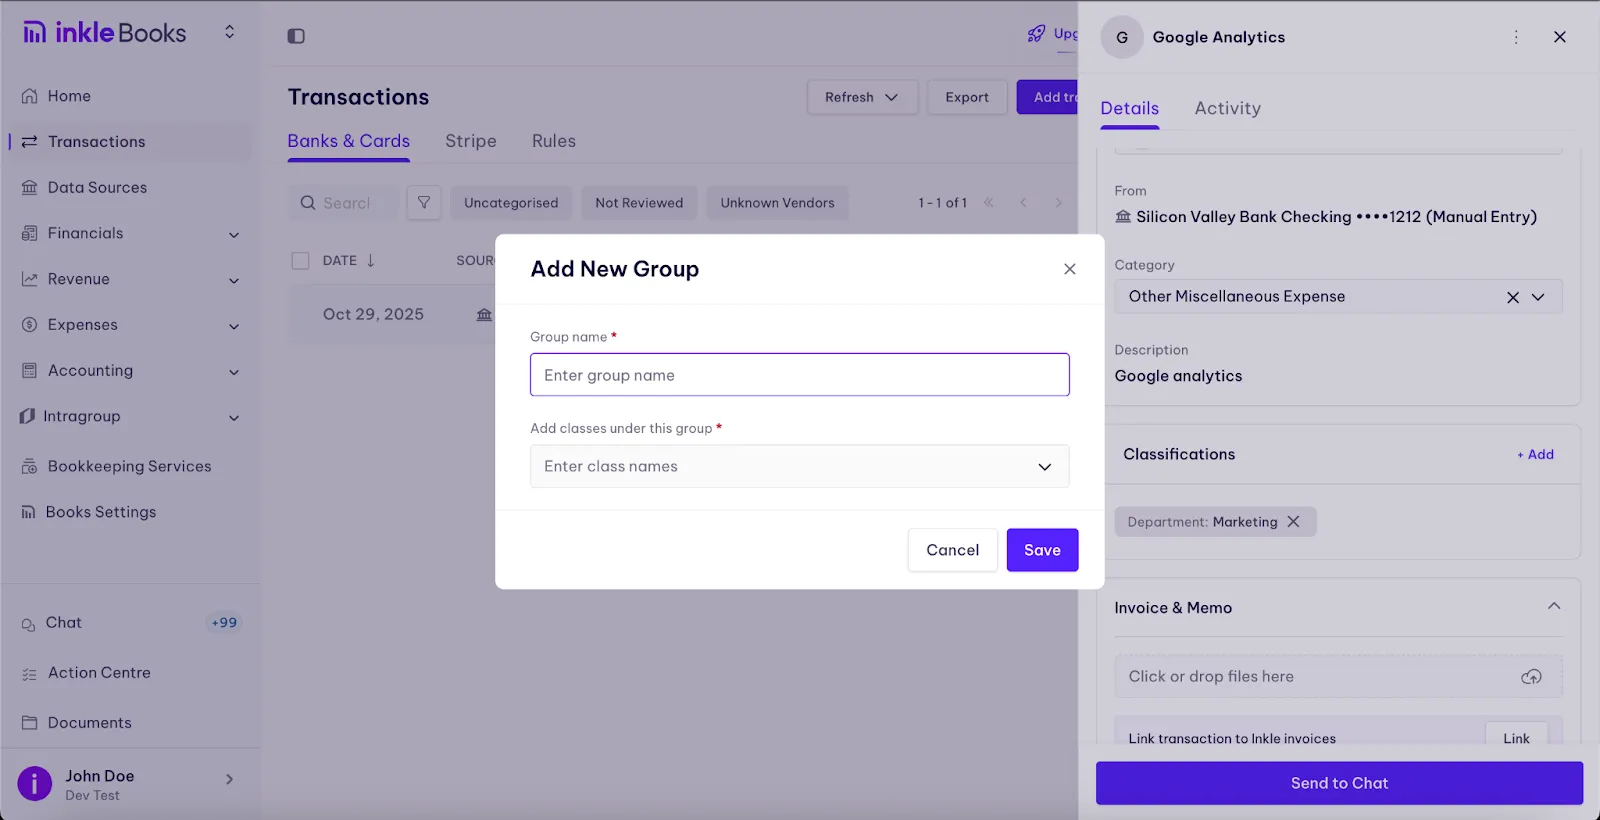
- From the dropdown, choose the Group that best fits — for example:
- Sales & Marketing for ad campaigns or social media spend
- R&D for product or engineering tools
- Operations for admin or recurring overheads
- Sales & Marketing for ad campaigns or social media spend

- Select the Class under that group.
- e.g., under Sales & Marketing, choose Paid Ads or Events
- e.g., under Sales & Marketing, choose Paid Ads or Events
- You can add more than one group if the transaction is shared across teams.
- Click Save once done.
Example: You bought a $200 Zoom subscription used by both Sales & Marketing and Customer Success.
Add both Groups → assign Classes like “Software Subscriptions” → Save.
2. Viewing and Using Grouped Data
- Go to Live Financials.
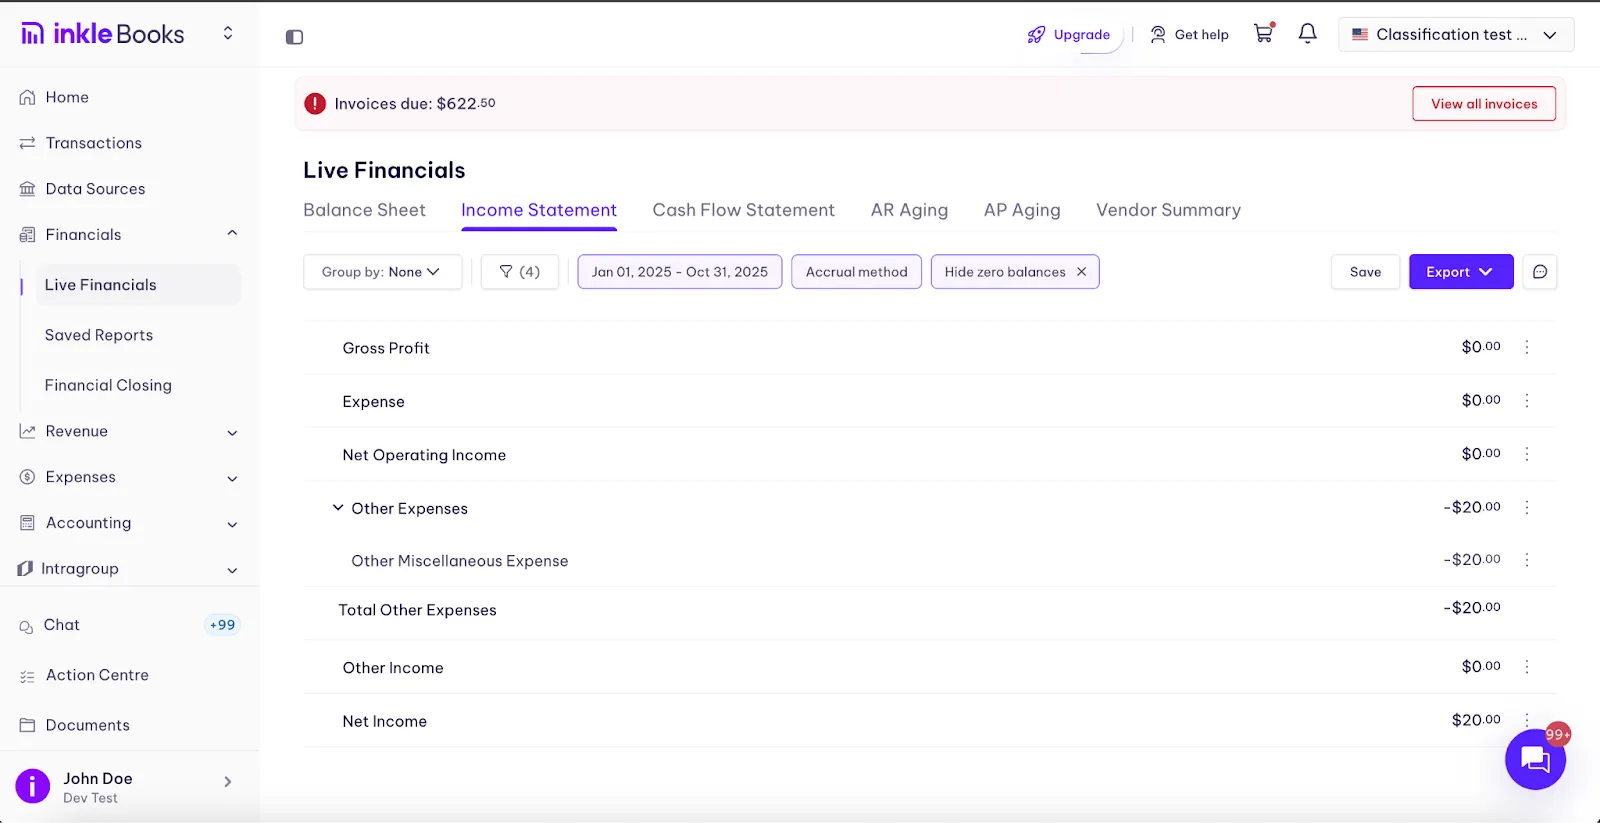
- Open your Income Statement.
- On the top-left corner, click the Group by dropdown.
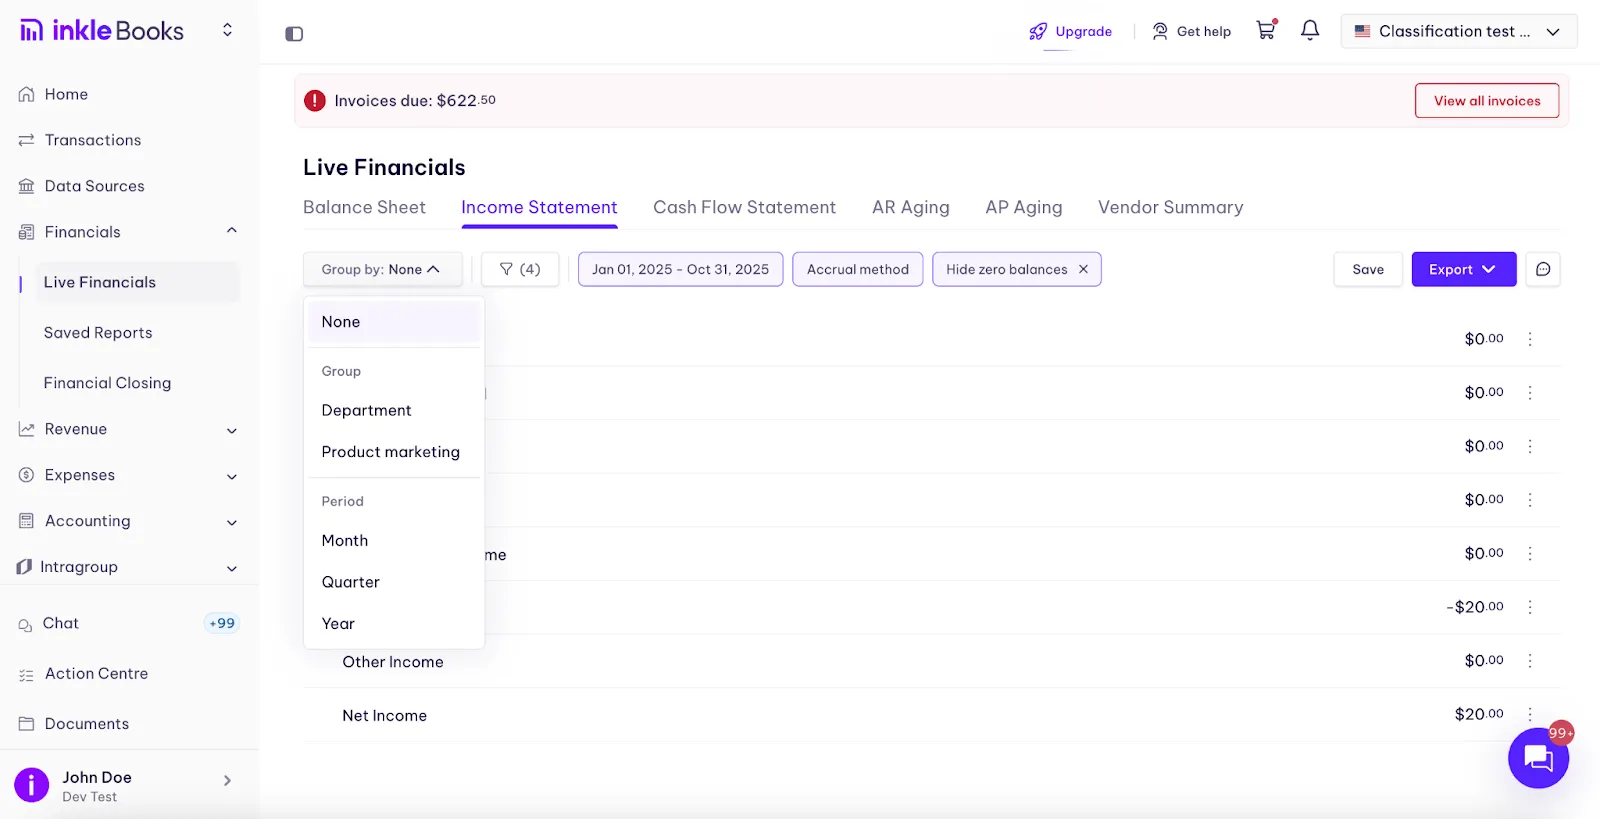
- Choose the Group you created earlier (e.g., Sales & Marketing).
- The Income Statement will now display all transactions grouped by that selection.

Example: Select “R&D” → You’ll instantly see every transaction tagged under that group, helping you understand your product development costs at a glance.
3. Recommended Day-to-Day Workflow
- Upload or sync transactions.
- Let AI auto-categorize them to the right expense/income account.
- Add Groups and Classes under each transaction’s Classifications section.
- Review grouped reports inside your Income Statement under Live Financials.
Tip: Make it part of your monthly close. Tag all new transactions with the right Groups and Classes so your reports stay clean and department heads stay aligned.
Outcomes
Using Groups and Classes in Inkle Books helps you turn messy expense data into organized, decision-ready insights.
Here’s what you get out of it:
- Clear visibility across departments
See exactly how much each team, project, or business function is spending. All in one place.
- Faster, cleaner bookkeeping
Bookkeepers can categorize expenses accurately the first time, reducing back-and-forth and rework.
- Smarter budget management
Track actual spend vs. budget by department or class, so you can spot overruns early.
- Better decision-making for founders & CFOs
Instantly identify high-cost areas or underutilized budgets to reallocate funds where they matter most.
- Investor-ready reporting
Generate department-wise reports in a click, perfect for investor updates, board reviews, or audit prep.
- Reduced manual effort
No more cross-checking spreadsheets. Automated classification and filtering make monthly closes faster and stress-free.
Still have questions?
Reach out to our support team if you have any additional questions regarding filing.