How to handle vendor bills in Inkle Books
Bills in Inkle Books help you record what you owe to your vendors, contractors, or service providers, all in one place and directly connected to your bookkeeping.
Instead of relying on vendors to generate formal invoices (many won’t), or juggling PDFs, screenshots, and email threads, you can:
- Create a bill yourself when a vendor doesn’t issue one
- Upload a bill from any external billing system
- Keep every payables organized, attached with documents, and ready for bookkeeping
- Let Inkle’s AI + bookkeepers categorize it correctly and reconcile it when the payment clears your bank
Creating a bill in Inkle doesn’t process a payment, it simply keeps your financial records accurate, helps you maintain clean books, and ensures your reports and tax filings reflect every expense properly.
Bills are essentially your source of truth for upcoming or unpaid expenses.
By storing them inside Inkle, your books stay complete, compliant, and always investor-ready.
When you should create a bill
You should create a bill in Inkle Books anytime you owe money to a vendor and want that expense accurately reflected in your books. This helps keep your financials complete, your month-end close smooth, and your tax filings correct.
Here are the most common scenarios:
1. When your vendor doesn’t issue a formal invoice
Many small vendors, freelancers, and contractors simply send you an email or message with the amount due. You can create the bill yourself in Inkle so the expense is still captured in your books.
2. When you receive a bill from another system
If your vendor uses Zoho, Razorpay, QuickBooks, Stripe Billing, or sends a PDF: Upload it into Inkle, and we’ll store it, categorize it, and sync it to your books.
3. When you want books to reflect expenses before they’re paid
For clean monthly or year-end reporting, you may need to record costs the moment they’re incurred - not just when cash leaves your account. Creating a bill ensures the expense is recognized at the right time.
4. When you’re preparing for bookkeeping or tax season
If your books are behind and you’re catching up: Creating bills helps us clearly understand your expenses, vendor relationships, and outstanding payables.
5. When you want every record audit-ready
Adding bills with attachments (PDFs, screenshots, contracts) keeps your records complete, aligned, and easy to reference later.
How to create a bill (step-by-step)
Follow these steps to create a new bill inside Inkle Books:
Step 1 - Go to the Bills section
Open Inkle Books and click on Bills from the sidebar/navigation menu.
This takes you to your bills dashboard, where you can see all open, paid, and overdue bills.
Step 2 - Click on “Create Bill”
You’ll see a Create Bill or + New Bill button at the top right.
Click it to start entering bill details.
Step 3 - Add your vendor details
Select an existing vendor from the dropdown.
If this is a new vendor:
- Click Add Vendor
- Enter the vendor’s name and any basic details
- Save the vendor so it auto-fills next time
Step 4 - Enter the bill information
Fill in the required fields:
- Bill Date - when the bill was issued
- Due Date - when payment is expected
- Bill Number - optional if your vendor didn’t provide one
- Amount - the total amount owed
- Description / Notes - what the bill is for (optional but helpful)
Step 5 - Attach supporting documents (recommended)
Upload the vendor’s invoice, a PDF, a screenshot, or even an email extract.
Accepted formats typically include PDF, JPG, PNG. Attachments help keep your records audit-ready and help bookkeepers review faster.
How to upload an existing vendor bill
If your vendor has already shared a bill. Whether it’s a PDF, a scanned copy, or a file generated from tools like Zoho, Razorpay, QuickBooks, or Stripe Billing, you can upload it directly into Inkle Books. This ensures the bill is stored properly and reflected in your books without recreating it manually.
Follow these steps:
Step 1 -Go to the Bills section
Open Inkle Books and navigate to Bills from the sidebar or top menu.
Step 2 - Click “Upload Bill”
You’ll see an option like Upload Bill or an upload icon at the top-right of the Bills dashboard.
Click it to start the upload process.
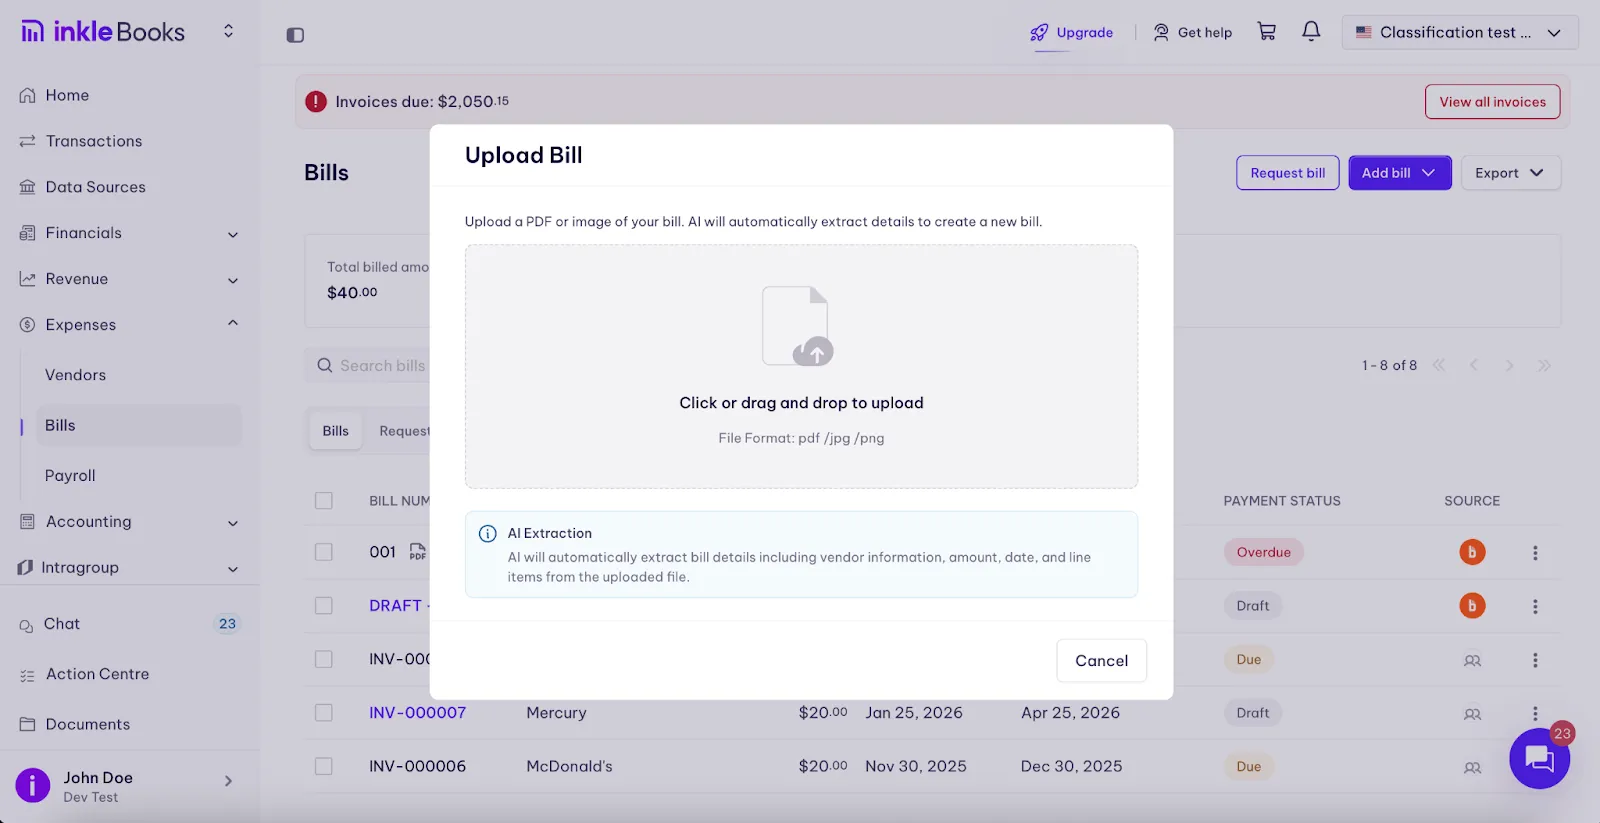
Step 3 - Select the bill file
Upload the file by:
- Dragging and dropping it into the upload window, or
- Clicking Choose File and selecting it from your device
Supported file types usually include PDF, JPG, PNG, and other common formats.
Step 4 - Add the vendor’s address
Under Vendor Address, begin typing the address.
Select or enter the correct one so the bill contains complete vendor information.
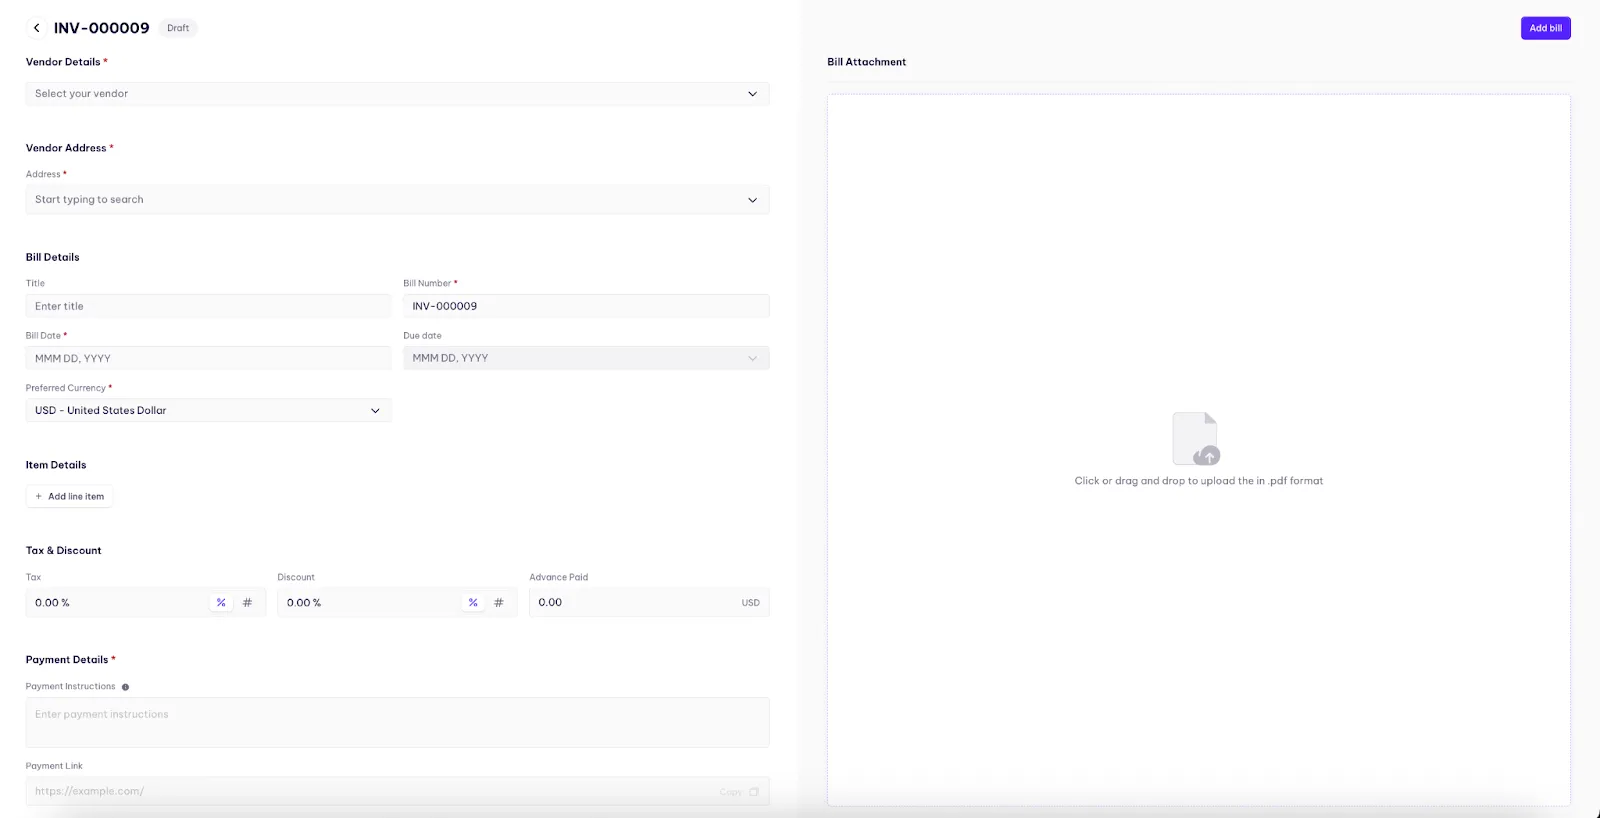
Step 5 - Fill out the Bill Details
In the Bill Details section:
- Title - a simple name for the bill (e.g., “Marketing Retainer – Nov 2025”)
- Bill Number - auto-generated, but you can edit if your vendor uses a specific numbering format.
- Bill Date - the date the bill was issued
- Due Date - when payment is expected
- Preferred Currency - choose USD or another currency depending on the vendor
Step 6 - Upload the bill attachment
On the right side, under Bill Attachment:
- Click or drag & drop the file
- Upload your vendor’s PDF invoice or document
Attachments should be in .pdf format.
This keeps your bill audit-ready and helps the bookkeeping team verify details quickly.
Step 7 - Add tax, discounts, or advance payments (if applicable)
Under Tax & Discount:
- Tax - enter a percentage or absolute value
- Discount - enter any discount provided
- Advance Paid - if you’ve already paid part of the amount, enter it here
All fields are optional.
Step 8 - Add payment details (optional)
If your vendor has specific payment instructions, add them here:
- Payment Instructions - notes on how to pay
- Payment Link - if they’ve shared a checkout link (Stripe, Razorpay, etc.)
- Payment Terms - e.g., “Net 30,” “Due on receipt,” or any custom terms
These fields help you or your team reference payment info later.
Step 9 - Review and save the bill
Once all details look correct:
- Click Add bill (top-right)
Your bill will now appear in your Bills dashboard, ready for bookkeeping, categorization, and payment tracking.
Where the AI Agents Help
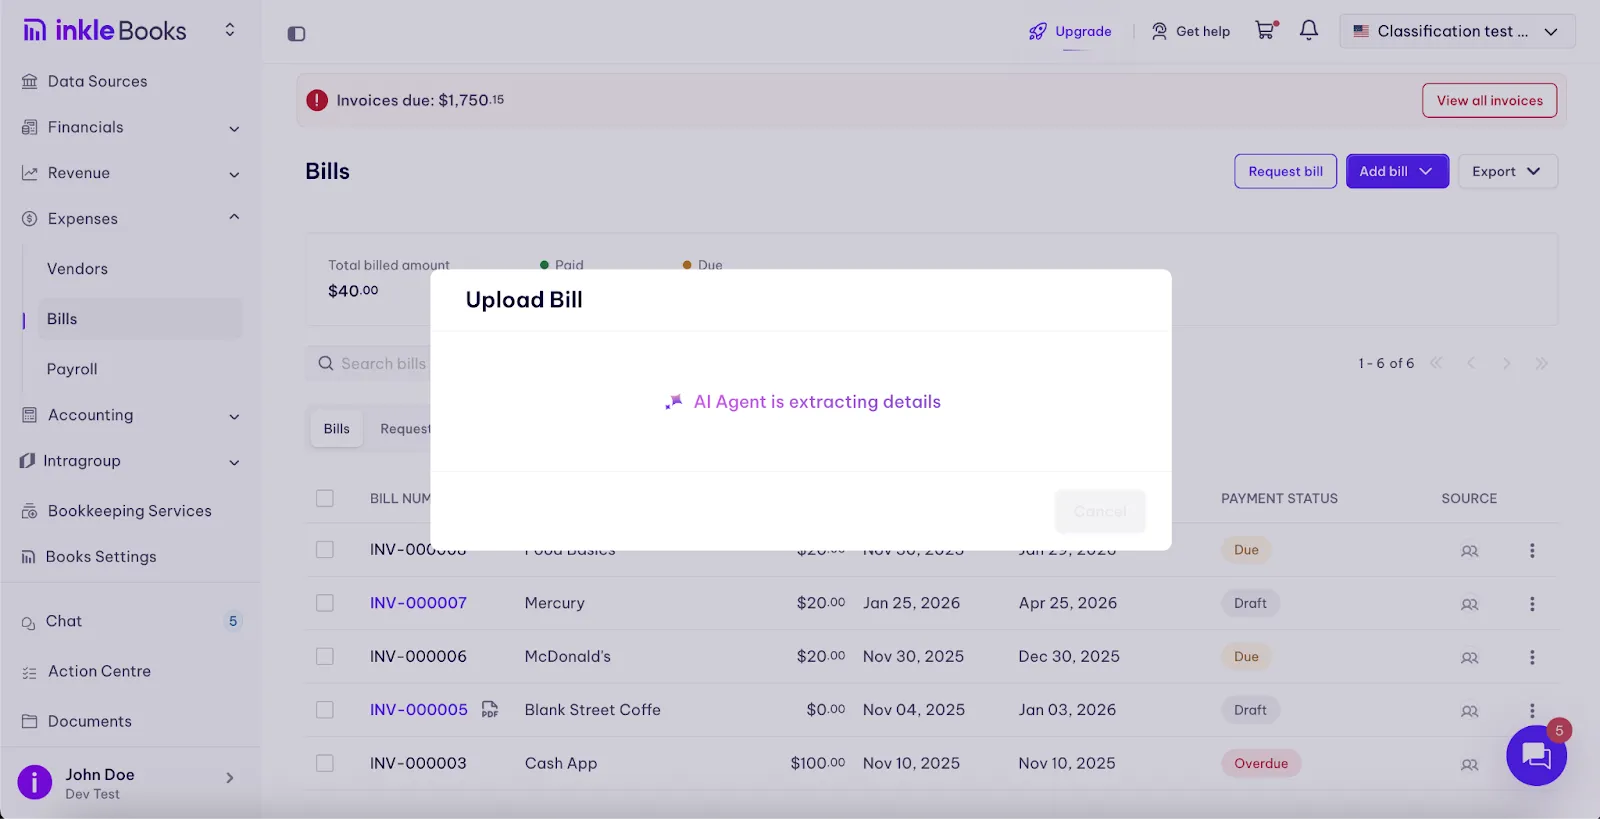
When you upload a vendor bill, Inkle’s AI Agents automatically step in to extract the key details from the document - such as the amount, bill date, due date, and vendor information.
This reduces manual entry, speeds up the bill-creation process, and ensures the information captured in your books is accurate. You’ll see a confirmation screen like the one below while the AI Agent processes your file
How Bills keep your Books clean
When bills are created or uploaded accurately, Inkle can keep your books fully aligned without extra follow-ups or manual corrections. Once you pay the vendor, the payment automatically appears in your synced bank feed, and Inkle matches it to the bill in your general ledger. This ensures:
- The expense is recorded in the right category
- The vendor balance is updated
- The bill is marked as paid
- Your month-end reports stay clean and error-free
Because the bill and the payment are linked, you get a clear, audit-ready trail from the original bill -> to payment -> to ledger entry, with no missed expenses or duplicates.
Still have questions?
Reach out to our support team if you have any additional questions regarding filing.